
Don’t Overlook These Home Training Mistakes
In the last article, we discussed some home training mistakes and the dangers that improper form can have on-at-home push-based workouts. Everything from shoulder pain to back and knee pain was easily avoided by adhering to proper form for basic and effective workouts. Similarly, this article will delve into more DIY workouts that focus on push movement.
Home Training Mistakes: Form is key
In today’s article over at home training mistakes we are going to focus on these 3 pushing movements:
- The Pull-up
- The Row
- The Crunch
The Pull-Up
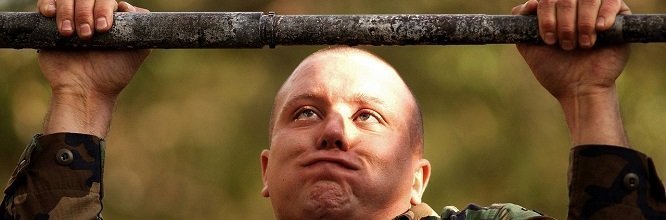
Without a doubt, the pull-up is one of the best exercises for the back. It works muscles like the Lats, the scapular retractors, and the flexors of the upper extremity.
It also works the core as you need to stabilize your lower body in performing it properly. For many years, exercisers believed that the wider your grip on the bar, the wider your back will grow. Furthermore, to accentuate the shoulders/traps, weightlifters are used to pulling the back of the neck to the bar.
However, after many years of research, we have learned these techniques to be a myth and possibly injurious.
The research revealed that the wider the grip on the bar has no effect on how wide the back is and pulling the back of the neck to the bar doesn’t work the shoulder musculature and traps as once thought.
After thorough peer-reviewed studies, we have found by pulling the back of the neck to the bar did not only fall short in recruiting the shoulders and traps, but researchers found the development of both anterior shoulder joint laxity and a propensity for cervical spine problems with this movement pattern.
It is advised to perform the pull-up by pulling the chest to the bar and never the back of the neck (this is true with the pull-down as well).
Moreover, when looking at EMG and MRI studies we see the greatest lat recruitment is with a supinated (palms toward the body) grip not pronated (palms away from the body).
It is theorized that this position stretches the lats in its greatest position requiring the greatest amount of recruitment of muscle fibers to exert force. This does not mean one should not change their pull-up grip immediately, but one should vary it and dismiss the myth.
I personally use all grips and even use a towel, rope, or rock climbing holds to perform pull-ups. I believe it is easy to see that the pros don’t outweigh the cons with these two maneuvers. Vary your grip, always pull to the front and remember to inhale on the descent and exhale on the ascent.
The Row
Another great exercise, but if done improperly can lead to awful low back pain and shoulder tendonitis. Some people perform barbell rows, some dumbbell rows, but we recommend one-arm dumbbell rows for a few reasons.
Most people perform the barbell row with poor form, especially in the lumbar spine. In most cases, the lumbar extension/neutral position cannot be maintained and instead of the lumbar spine being stabilized and the upper body working, exercisers usually hinge and pull from the lower back leaving the discs, muscles, and ligament susceptible to injury.
The same execution happens with the bilateral dumbbell row. If your lower back is not strong enough, and your form is not on point, injury can easily ensue. Furthermore, the over-hand grip, albeit excellent, can lead to shoulder tendon stains if you are not conscious of keeping the elbow lower than your shoulders.
If done improperly, the wrong form with the row can literally saw through the rotator cuff tendons (sounds pleasant).
I presently have a patient dealing with this now from the row done incorrectly for a decade. His rotator cuff tendons are now completely frayed.
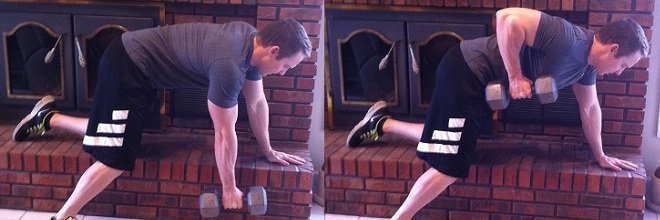
Now let’s review why we recommend the one-arm dumbbell row with variations. The one-arm dumbbell row starts by using a bench, chair, or even the side of a bed if necessary. We begin by putting the same hand and the same knee on the bench with the other foot solidly planted behind us so your opposite arm dangles with the weight.
We begin by performing a row or a sawing motion first with the palm facing your body. Focusing on the arms grazing the side of the body. We then advance and also change the hand in order to get a different angle of pull on the muscles involved. So in essence, you would perform one set with the palm towards the body, as well as palm up and face down making sure never to let the elbow go over the height of the shoulder.
The row is an amazing exercise. Master the form, control the weight properly, and use bands if necessary because your muscles will not know if you are pulling a dumbbell or a stretch band.
The Crunch
Everyone is aware of the abdominal crunch exercise. It can be an excellent exercise for the rectus abdominals, or the 6 pack, but if done improperly can do more damage than good.
In addition, it can tighten the already tight hip flexors and minimize work on the abs.
First mistake we see is too much pulling on the neck.
If you are keeping the hands behind the head to increase the lever arm and force needed for exercise, remember to not pull on the head and neck. Gently place the fingertips on your head or keep your middle fingers on your ears. These two methods will negate the undue stress on the cervical spine.
Second, the lower back should not come off the ground. Too many people use momentum and not muscle to do this action.
Upon the descent, some may have a tendency to arch their back or even take the back off the floor before the next repetition. This once again uses physics to assist and minimizes the muscle work, thus adversely affecting the abs.
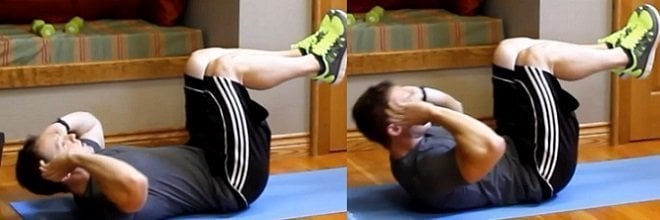
Lastly, we teach the butterfly crunch instead of the traditional one. With this exercise, our knees do not face the sky when we crunch. The bottoms of the feet are together with knees out to the side in the “butterfly position”. This biomechanical change ensures that the tight hip flexors are on slack and out-of-the-way of the exercise.
Now more force can be developed in the abdominals and less momentum is allowed in this position.
Note: Ab rollers are a great way to get a 6 pack (along with your diet). Check out our review of the best ab rollers on Amazon.
Wrap-Up
If you didn’t learn anything, then I don’t know what to tell you! I love this article from Dr. Weiss because it not only vividly tells you why the form you commonly see is incorrect but also how you can fix it to unleash your inner beast!
Now avoid these at-home training mistakes and concentrate on that form!
Sidenote: When it comes to pullups, make sure to work on your grip strength as well to maximize your workouts!

During his career, Dr. Weiss has worked with a variety of professional spots organizations including both the 2004 and 2008 United States Olympic Teams, The National Football League (NFL), The National Hockey League (NHL) and the New York Liberty-WNBA.
- Evidence-Based Expert Rotator Cuff Exercises - October 24, 2023
- Training Mistakes to Avoid: Pull Up, Row, & Crunch Exercises - December 22, 2015
- Push It Hard: How to Avoid At-Home Workout Injuries - October 28, 2015


