Teach Swim Lessons At Home
Looking for practical advice on teaching your kid swim lessons at home? This simply amazing guide can help you teach your child outside of swim lessons (or totally teach them) quickly, on a budget, and at home. This is a great must-read!
Want to give your kid swim lessons?
As a ten-year veteran swim instructor, I’m often asked what parents can do outside of swim lessons to help their child improve as a swimmer.
Some parents just want to get extra practice in between traditional swim lessons, while others understand the importance of teaching their child to swim, but don’t have the financial means to pay for ongoing swimming lessons.
In addition to saving money, working with your child will strengthen the bond between the two of you and you might learn something in the process!
Whatever your reasons for deciding to work one-on-one with your child, this article covers the most important skills for your child to learn at each age level based on my experience as a Red Cross certified Water Safety Instructor (WSI).
Playful Paddlers: Infants & Toddlers
 If you’re already thinking about swim lessons for your toddler, give yourself a pat on the back.
Even though your child may not learn to “swim” right away, it’s important to start building skills that will benefit her when she’s physically ready to take on the challenge.
When it comes to infant swimmers, remember that babies are designed to withstand water. In fact, they’re imbued with a natural response called the bradycardic reflex that causes them to close their eyes and hold their breath when they submerge in water.
Although this reflex wanes after 12 months old, introducing your child to water early will help her develop a similar instinct later in life.
The Fear Factor
When teaching a child to swim, the biggest setback is fear. As adults, we shape our children’s reactions to everything – from spills and falls to bugs and water. Think about it: when your baby falls down, she doesn’t start sobbing immediately.
She looks at you to gauge your reaction and cries if it seems fitting. Parents who react to accidents like this with a smile and a statement like “you’re okay” might get a tear or two as a pain response, but the baby won’t overreact if you don’t.
Water is no different. Make sure you’re not coddling your child at bath time by deliberately keeping water away from her face, or gasping when she does get water in her eyes or mouth.
Your child is learning how to interact with the world every second and she’s watching you for guidance.
Overcoming the Fear Factor
If your child is already fearful, don’t jump right into a structured lesson. Start with some fun games in the pool with no educational agenda. You can spring for some store-bought toys or use items you already have around the house. Sinking toys are ideal for practicing bubble blowing and getting used to the face being in the water.
A favorite game of mine is to scatter some change on the pool steps and have the child collect as many coins as she can in 30 seconds. Floating toys are equally important. Anything that sits on the surface of the water can be used to practice arm-reaching, which helps a child get a feel for balance in the water.
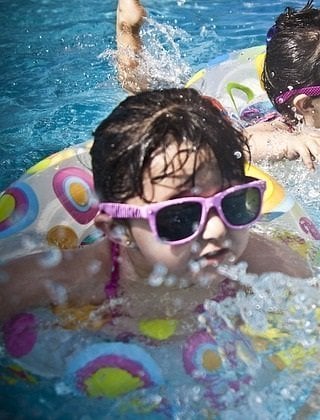 Plus, it encourages the child to reach out and away from her body, rather than clinging to you. Many standard toys, like balls and teething rings, will float. If you don’t have either of those, use fruit like an apple or an orange.
Your child can even eat the fruit when you’re done playing (but be sure to wash it first).
Start Slow
Beyond games, make sure your child practices gripping the side of the pool on her own and climbing out unassisted. Children as young as 12 months old should be able to do so. (Your kids climb all over the furniture, don’t they?).
Give your child a phrase to help her remember the mechanics of climbing out. I keep it simple, with words like ”elbow, elbow, tummy.”
Once the child’s belly is on the side, she’ll know to get a knee or foot up onto the deck to complete the action. And if your child will jump to you in the pool, make sure that you ALWAYS return to the side of the pool immediately. You need to ingrain the idea of turning around and finding the safety of the side.
I tell my students, “I won’t always be around to help you, but the side is always there.”
Movers & Shakers: Children 3 – 7 Years Old
Kids between 3 and 7 years old are in their prime for learning how to swim. By this age, most children have gotten over their fear of the water. And they can understand why they’re being asked to learn this new skill.
Encourage your child further by telling her all the fun things she can participate in once she can swim: pool parties with friends, water parks, and snorkeling adventurers are all things a non-swimmer might miss out on.
At this age, you should still be practicing bubble-blowing every time you’re in the pool. There’s nothing more important than exhaling when your child’s face is in the water, and your goal is to make this an automatic response. That way, if your child falls or is pushed into a pool, she’ll start exhaling immediately and won’t choke on water. This can be a life-saving measure in many cases.
Inhaling water incites panic which will inhibit your child from finding her way to the side of the stairs. In addition to blowing bubbles, you should work on basics like kicking and pulling with the arms.
It’s also recommended that you practice some essential survival skills like floating and rolling over in the water.
Start With Kicking
Kicking is fairly basic. If you have a kickboard, have your child grip the sides of the board firmly, while leaving enough space for her head to be in the water. While she blows bubbles, encourage her to stretch her legs out behind her body and “flop” her feet to make small splashes. This is one instance where “bigger” doesn’t necessarily mean “better”. Some beginning swimmers confuse big splashing with effective movement.
However, large splashes mean your child is wasting energy on bending her knees too far out of the water to cause a splash.
Tell her to keep her feet close together, bend the knees slightly and let her feet be floppy. If her knees come up under her body too much, your child will get tired and won’t make it very far.
Get the Arms Involved
 Once your child is comfortable with kicking, you can have her start pulling with her arms. It doesn’t matter what style you choose. Some kids prefer a windmill style with alternating arms reaching out and pulling water back behind them; others prefer a wide pull with both arms, pulling water out to the sides simultaneously.
Practicing with ping-pong balls can be extremely helpful for the windmill style. Toss the balls into the water and have your child grab one in each hand. If her hand doesn’t come down directly over the ball, it will float farther away, encouraging her to take her hand all the way out of the water before reaching forward again.
The alternative technique, pulling widely to the sides of the body, is a more natural movement for most kids and doesn’t require much practice to master.
Back-Up Plan
New swimmers should learn how to do a simple back float, and how to roll into a back float from the swimming position. To float, all your child will need to do is spread her arms and legs across the water (like a starfish) and lean her head back until all of her hair is wet. Your child’s ears should be submerged and the water line should be up around her face.
When in a swimming position, she should be able to roll over to her back anytime she gets tired. To do this, all your child needs to do is turn her head to one side, touching her chin to her shoulder as though looking behind her.
Because the body follows the head in water, she’ll roll over onto her back without much effort.
Lifeguards In Training: 8+ Years Old
As your child progresses, she’ll be swimming with a greater degree of confidence. Whether or not she’s executing the perfect stroke doesn’t really matter at this point, as long as she can move through the water efficiently and independently. When working with older kids, you can introduce some more challenging skills like bobbing, treading water, head positioning, and water rescue.
Bobbing drills are crucial for kids learning to swim with a proper stroke. Bobbing is essentially jumping up and down in the water, paired with rhythmic breathing. Have your child start in the shallow end. She’ll bend her knees and submerge. As she goes under, she should exhale fully. You can tell if the entire breath has been released by looking at her mouth when she comes up.
If her mouth is open, she’s ready to inhale. If her lips are closed, she may still have some air that should have been expelled underwater. Each time she pops up, she should take a sharp inhale and immediately re-submerge and exhale again.
This prepares your child to regulate her breath when it comes to swimming a more traditional stroke later on.
Treading Water
Aside from breathing practice, treading water is paramount to your child’s safety — especially if you live near a lake or ocean. Treading water is an ideal skill to use when a child finds herself in need of rescuing. With her head out, she can see and hear her surroundings, as well as call for help.
Your child can practice treading water by grabbing the pool wall and practicing a bicycle movement with her legs. Once she feels comfortable with that, she can let go of the wall with one hand and begin the arm-pulling movement. Keeping hands flat and fingers together, your child should “spread” her hands back and forth in long, sweeping motions, extending her arms away from her body. (Tell your child to imagine icing a cake, with her hands acting as the knives).
As with most swimming skills, a broader motion requires less work and won’t wear your child out as quickly. With practice, your child will be able to let go of the wall with both hands for a few seconds and then a few seconds longer.
When she’s treading water for 10 – 20 seconds without grabbing the wall, have her try the exercise farther from the side of the pool.
Focus On Head Position
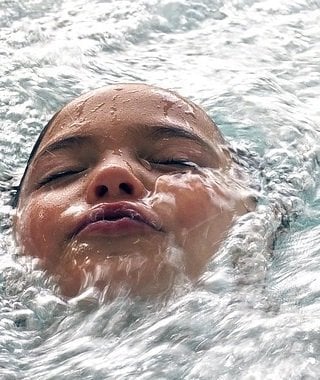 When it comes to swimming lessons, this is also a good time to explain the importance of head position while swimming. The body operates like a teeter-totter in the water. When the top of your head points up, your feet point in the opposite direction. You can demonstrate this yourself by holding your head straight out of the water and feeling your feet sink toward the bottom.
When you put your face in the water, looking down, your feet will float up behind you and put you in the proper position for swimming or floating.
Have your child try this for herself. Ask her to glide as far as she can with her head out of the water.
Mark the distance and then have her glide again with her face in the water and head pointed forward. She’ll soon see how much more efficient she is when her head is in the right place.
To The Rescue
By approximately age 8, children can learn to rescue another swimmer safely in an emergency. When teaching rescue skills, start by firmly telling your child never to enter a pool to assist someone. She needs to understand that, if she gets in the pool, a drowning victim could cling to her and drag her underwater as well.
The best thing to do is to reach out or throw something to the person in need. If the struggling swimmer is close to the side of the pool, your child can lay on the deck on her belly and reach an arm out to assist. This low position makes it nearly impossible to get pulled back into the water.
If the victim is farther than an arm’s reach from the side, your child can toss a rope or garden hose toward the struggling swimmer. Or, she can reach out with a long pole like a pool broom or skimmer. If there is nothing like this around, your child can toss a floating object like a kickboard, buoy, or plastic bottle to the person struggling.
Let your child practice rescuing you safely so she’ll be calm and confident should she need to assist another swimmer in the future.
Wrap-Up
IMPORTANT: If your child just doesn’t want to listen to you or you can’t get them to focus, consider traditional swim lessons.
Even if your child only takes a few swim lessons, having a dedicated instructor frames pool-time as a learning experience rather than play-time. You can still practice at home, but use swim lessons as a framework for your home practice to build on skills your child has already worked on in class.
Like learning to read, swimming is a life-long skill that every child should learn both for their own safety and personal enjoyment.
Updated 5/6/18
- How To Teach Swim Lessons For Kids - July 27, 2016


